Step 1:
Open Visual Studio 2010 and Select “New Project”, ASP.NET MVC2 Web Application
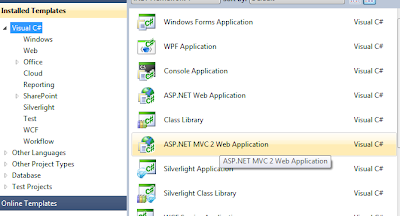
Once the project is created it will look similar to what is shown below.
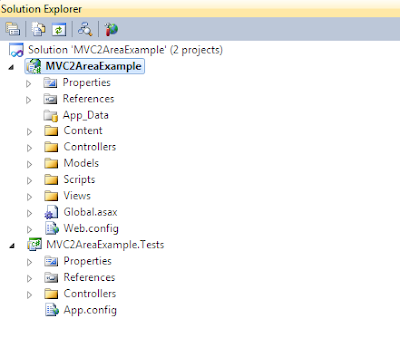
Step2:
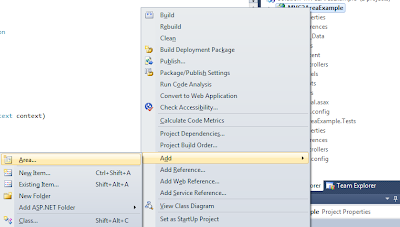
In the Solution Explorer Window Right Click on the Project File and Click “Add”, then click “Area”
Step3:
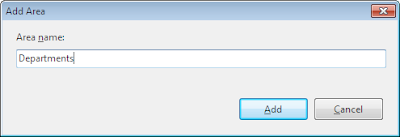
Enter the Area Name such as “Departments”
Note:
An example of an Area is shown below.
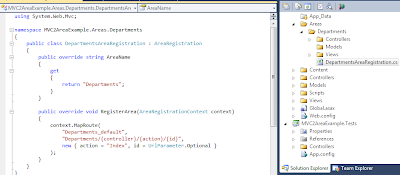
Code Snippet:
public class DepartmentsAreaRegistration : AreaRegistration
{
public override string AreaName
{
get
{
return "Departments";
}
}
public override void RegisterArea(AreaRegistrationContext context)
{
context.MapRoute(
"Departments_default",
"Departments/{controller}/{action}/{id}",
new { action = "Index", id = UrlParameter.Optional }
);
}
}
In addition to this code there is code in the “Global.asax” that is registering your areas as highlighted below.
protected void Application_Start()
{
AreaRegistration.RegisterAllAreas();
RegisterRoutes(RouteTable.Routes);
}
Step4:
In the Solution Explorer Window Right Click on the Areas/[YourArea]/Controllers and Click “Add”, then click “Controller”. For this example the path would be “Areas/Departments/Controllers/”
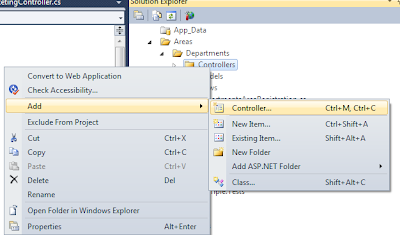
Step 5:
REPEAT STEP 4 FOR EACH CONTROLLER NEEDED. For this example create (3) three HR, IT, and Marketing.
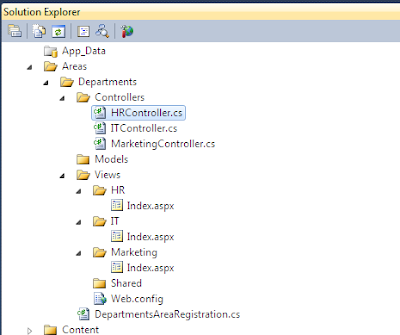
Step6:
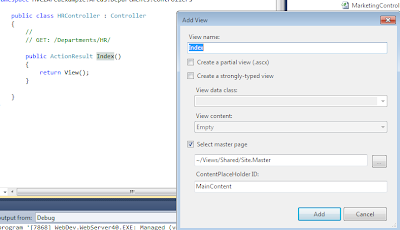
Next Add a View by right-clicking on the "Index" method in the appropriate controller and selecting “Add View”.
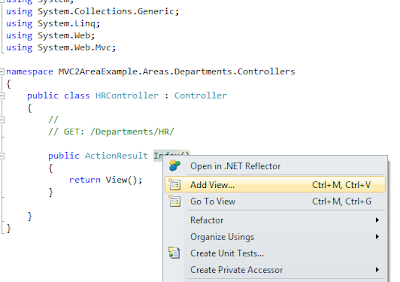
Step7:
REPEAT STEP 6 FOR EACH VIEW NEEDED. For this example create (3) three one for each respective controller.

Note:
Once this is complete you will now see the appropriate structure located in the Views Folder in the Solution Explorer.
Step8:
Run the project and navigate to the appropriate location:
http://localhost:[yourport]/Departments/HR
http://localhost:[yourport]/Departments/IT
http://localhost:[yourport]/Departments/Marketing
Hopefully this guide was useful as a quick 8 Step dive into the New "Areas" introduced with Microsoft Visual Studio 2010, ASP.NET and MVC 2.
No comments:
Post a Comment